How to Start a Video Podcast in 2026
Learn how to start a video podcast in 2026 with a step-by-step plan covering gear, recording, editing, YouTube, and a launch checklist.

YouTube is already the front door for a lot of podcast discovery. By early 2025, YouTube reported 1 billion monthly podcast viewers, and that changes how how to start a video podcast should be planned from day one. If the show is built like an audio-only project, the launch usually gets stuck on weak titles, bland thumbnails, and no repurposing system.
The practical answer is simple. Pick a focused show, set up a repeatable recording workflow, publish to YouTube and Spotify, then design clips and articles before episode one ships.
Why Video Podcasting Is a YouTube Game Now
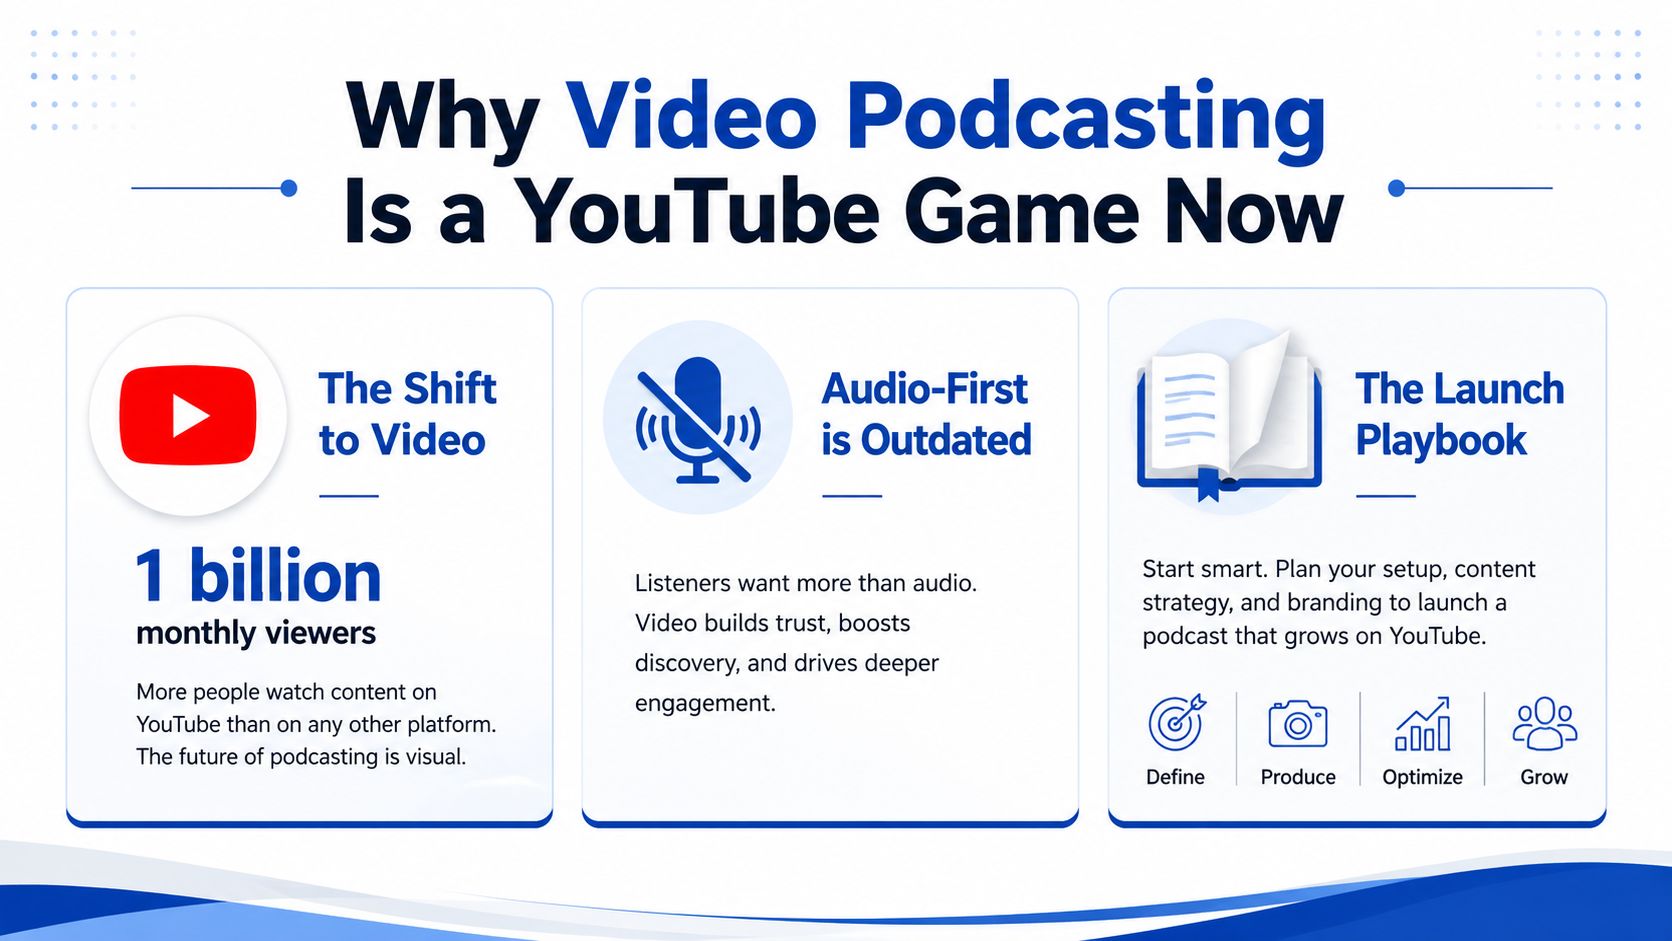
By early 2025, YouTube had 1 billion monthly podcast viewers. By fall 2025, about 27% of U.S. consumers were watching video podcasts weekly, and 70% of podcast consumers were using YouTube to watch or listen to podcasts according to Podbean's compiled statistics. That is not a side habit. That is where the audience already is, and it is why a launch plan for how to start a video podcast should start with YouTube, then build the rest of the workflow around it. If you want the show to grow instead of stalling after the first few uploads, plan the repurposing layer from day one, as outlined in this guide to turning a podcast into YouTube videos.
Start with the platform that already has the viewers
YouTube's size changes the launch logic. A new show needs searchable titles, clear thumbnails, and a playlist structure that makes one episode lead to the next. Audio platforms still matter, but they do not deserve the same planning time as the place where discovery already happens.
Spotify's numbers show the same shift. Spotify reportedly hosts over 250,000 video podcasts, up from 100,000 in 2023, and more than 170 million users have watched a video podcast there in Sweet Fish Media's summary of the market. That is why a launch plan cannot stop at recording and uploading. If the episode is only treated as a finished file, the team still has to figure out clips, social posts, and article support after the fact, which usually means those assets never get made.
Practical rule: if the first version of the show is not built for YouTube discovery, the show is already under-packaged.
The launch roadmap is straightforward. First, choose a niche and format that can repeat. Second, build the recording setup and guest workflow. Third, publish through YouTube and Spotify with a consistent cadence. Fourth, plan clips, posts, and article output before the episode is recorded, so the show is producing its own promotion instead of waiting for someone to find time later.
The rest of the work is less about equipment and more about discipline. The show has to be designed so one recording creates multiple assets without pulling the host into a second job every week.
Pick a Niche, Format, and Show Concept That Sticks
A show concept that sounds fine in a meeting can die on YouTube the moment it hits the feed. If a viewer cannot tell what the show is about from the title, thumbnail, and opening seconds, the video has already lost some of its value. “Marketing conversations” is too loose to package. “Weekly interviews with B2B operators about pipeline lessons” gives people a reason to click because it points to a clear outcome.
The test is direct. If the concept needs three qualifiers, it is still too wide. If the host cannot say who the show serves, what problem it addresses, and why someone should return each week, the audience will not fill in those blanks for them.
Validate the idea before the first recording
Spend 30 minutes in YouTube search before you commit to the show. Look at the titles, thumbnails, and formats already ranking around the topic. That quick scan shows whether the space rewards interviews, solo advice, or case-study style episodes.
Use one line to pressure-test the idea:
One-sentence test: this show helps [specific audience] solve [specific problem] by [specific format].
That line should feel narrow enough to use in a real pitch. “A show for founders about growth” is vague. “A weekly show for SaaS founders on turning sales calls into marketing assets” is specific enough to build around and specific enough to cut clips from later, which matters if the repurposing layer is part of the launch plan from day one rather than an afterthought.
Format choices shape the workload. Solo shows are easiest to schedule. Interviews add guest coordination, and they often make the show easier to promote. Panels create more editing work. Scripted episodes require the most prep and are usually the hardest to sustain.
- Solo: low scheduling friction, lighter prep, but more host pressure.
- Interview: moderate prep, useful for authority, and easier to turn into clips.
- Panel: stronger conversation variety, but harder to edit cleanly.
- Scripted: highest prep burden, best when the host needs full control.
Batch planning beats weekly scrambling. Planning four episodes at once keeps the show from collapsing under context switching, which is a common failure point in video podcast launches as described in a YouTube workflow example. That matters more than the format itself, because the weekly burden has to stay low enough for the show to survive past the first rush.
For a deeper angle on guest-led shows, this interview-based content strategy guide is useful background. The main decision is still the same, pick a concept the host can repeat without rebuilding it every week.
Gear by Budget Tier Without the Hype
Most beginners buy gear before they've proven the format. That usually wastes time and money. The smarter move is to match the setup to the show's stage, not to an imagined studio.
The baseline is simple. Start with audio first, a smartphone or 1080p webcam, and one controlled light source. A clean frame and intelligible voice beat expensive gear with bad placement.
| Tier | Camera | Mic | Lighting | Software | Total Range |
|---|---|---|---|---|---|
| Beginner | Smartphone or 1080p webcam | USB dynamic mic | Window light or one soft light | Basic recording and editing setup | Under $200 |
| Mid-tier | Dedicated camera | USB or XLR mic | Two-light kit | More robust editing workflow | Under $800 |
| Pro | Multi-camera room setup | XLR mics | Controlled studio lighting | Full production workflow | Over $1,500 |
The beginner tier is enough for a real launch. A USB dynamic mic, a phone or webcam on a tripod, and one soft light will produce a cleaner result than a rushed “pro” setup. The important part is that the host can record consistently without spending half a day adjusting gear.
Upgrade after repetition, not before it
A video podcast should earn a better setup. That usually means upgrading after episode 20, not before episode 1. The reason is operational, not aesthetic. Early episodes teach what the show needs.
The middle tier makes sense when the host already knows the cadence and wants sharper image quality. The pro tier is for shows with multiple speakers, a fixed recording space, and enough volume to justify a more formal room build. Until then, the extra spend mostly adds setup friction.
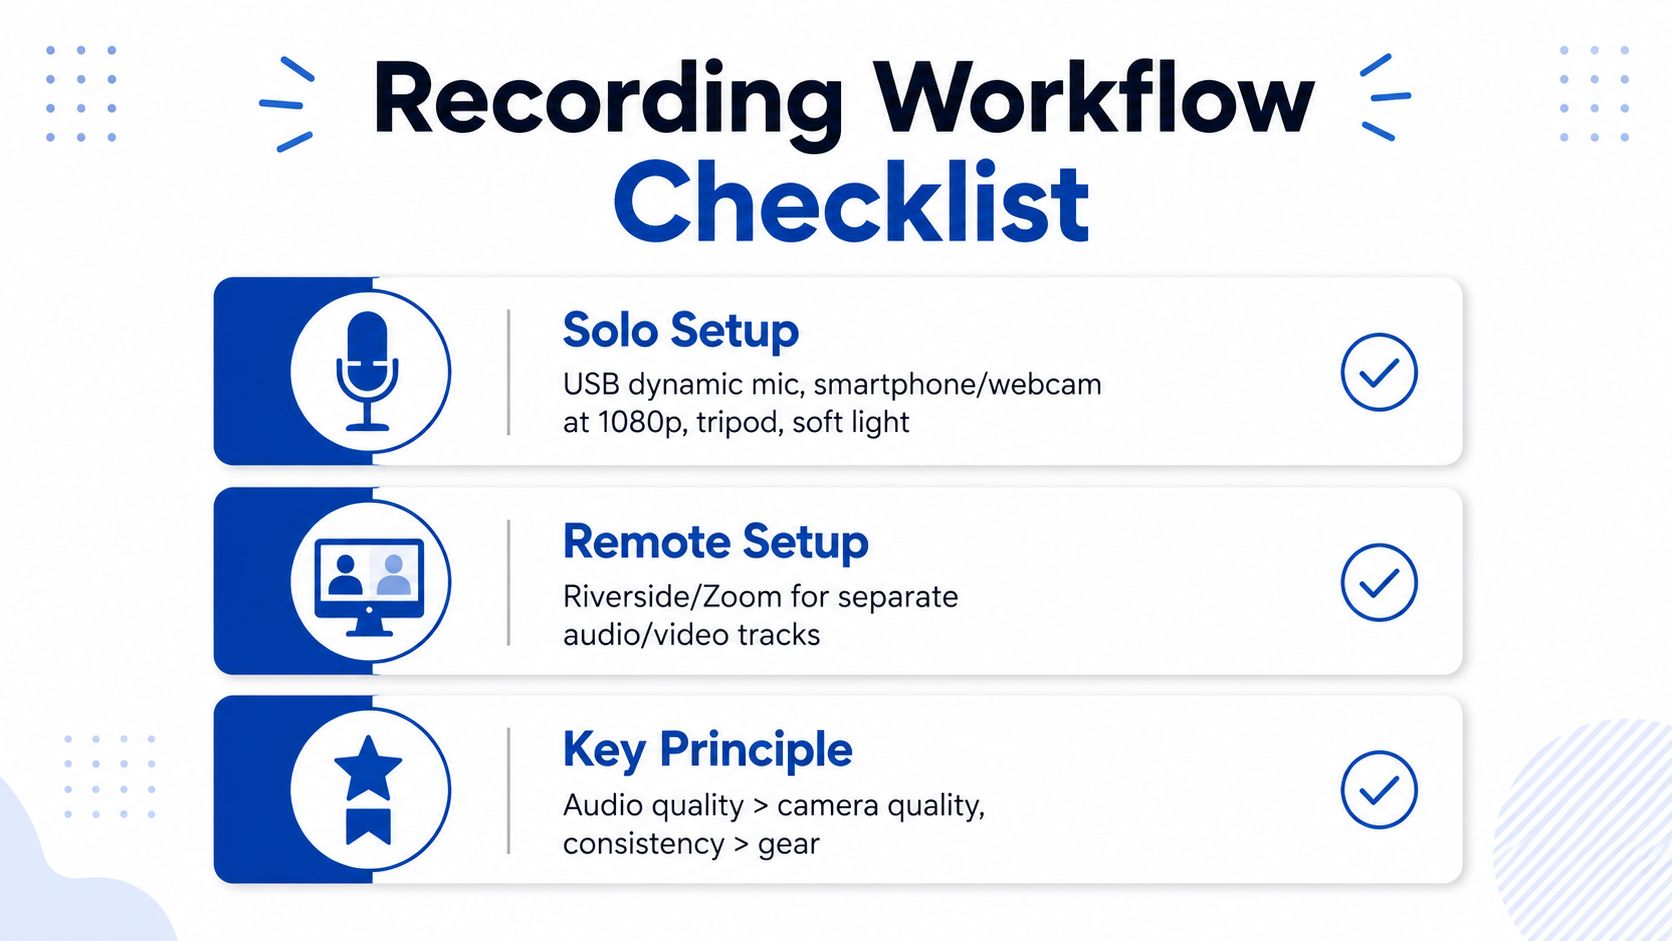
A useful rule from the technical side is that audio quality matters more than camera quality and consistency matters more than gear as noted in beginner setup guidance. That's the standard to protect. If the show sounds good and ships weekly, the audience usually forgives the rest.
For creators comparing gear with real budgets, this is the part to remember. Under $200, the goal is control. Under $800, the goal is repeatability. Above $1,500, the goal is production speed.
Recording Workflow for Solo Hosts and Remote Guests
Recording is where many new shows lose time. The setup looks simple, but every adjustment pulls attention away from the conversation. The best workflow is the one the host can repeat without rethinking it every week.
Solo recording should be boring
For a single host, the setup should stay fixed. Frame the face cleanly, keep the background uncluttered, and lock the light before hitting record. That makes the episode easier to edit and easier to clip later.
Riverside recommends placing the microphone 4 to 6 inches from the mouth and slightly off-axis to reduce plosives, then doing a 15-second test recording before the actual session. It also recommends healthy spoken-word peaks around -6 to -4 dB without clipping, and separate audio tracks for each speaker in its podcast setup guidance. Those mechanics save edits later, because bad audio is harder to fix than bad framing.
For remote guests, separate tracks matter even more. If one speaker's connection drops or talks over the other, the edit stays manageable. Recording each speaker separately keeps the session editable instead of collapsing the whole conversation into one file.
Remote guests need a clean frame and a simple system
A two-shot should be framed for both the full episode and vertical clips. Leave room around the faces so the crop still works for Shorts or Reels. That small choice saves re-editing time later.
Remote setup prioritizes preventing the session from becoming uneditable over making the guest look like a studio guest.
Podcast research also needs to stay organized as you record. Purdue Libraries says listeners should be told where information was found during the episode and that full citations belong in the episode notes. Zencastr adds a practical habit, write down the episode title, host, date, and a timestamp while listening, because timestamps act like page numbers for audio quotes in its research and citation guide. That matters as soon as the show uses sourced claims or quotations.
For teams comparing recording setups, this guide to meeting recording tools gives useful context. The decision still comes down to local control when possible, separate tracks when remote, and no improvising the setup every week.
A simple pre-recording checklist helps:
- Check framing: keep the eyes near the upper third of the shot.
- Check light: remove harsh shadows before starting.
- Run the test: record 15 seconds and listen back.
- Check levels: make sure the voice peaks stay clean.
- Confirm tracks: verify separate audio files if there are guests.
Editing and Post-Production Workflow With Honest Time Costs
DIY editing is the invisible second job that kills a lot of video podcasts. The recording ends, then the workload starts. For a 30-minute episode, a realistic workflow is not quick. It's a block of focused time that can easily swallow a workday.
Start with the rough cut. That usually takes 2 to 3 hours when the editor removes dead air, false starts, awkward pauses, and any sections that don't serve the episode. Audio cleanup often takes 1 to 2 hours more, especially if levels drift or there's background noise to smooth out.
The post-production stack adds up fast
Captions are not optional if the episode will be clipped and shared. Expect 1 to 2 hours for captions, depending on the tooling and the number of revisions. Thumbnail design and metadata usually take about 1 hour when the title has to work for both search and clicks.
The total DIY time lands around 4 to 6 hours per episode. That excludes clipping for social, which is a separate workload. For a founder or marketer with a full calendar, that's the cost of insisting on in-house post-production.
Use this sequence to keep the process sane:
- Rough cut the episode. Remove dead space and obvious mistakes first.
- Clean the audio. Fix the voice before polishing the image.
- Adjust color and framing. Make sure the show looks consistent.
- Add captions. Make the episode readable in muted feeds.
- Write the title and metadata. Package it for YouTube and Spotify.
- Export versioned files. Keep a clean master and channel-specific outputs.
For teams tempted by shortcuts, this guide to AI video editing tools is worth reading with caution. The important point is not the software category. It's the time budget. A tool can help, but it doesn't erase the post-production load.
The practical question is whether the show still works when this process repeats every week. If not, the workflow needs redesigning before launch, not after burnout.
Launching on YouTube and Spotify and Building a Repurposing Pipeline
Distribution is where most beginner guides stop. That leaves too much work for later. Once the episode is recorded, the next job is to place the long version and the short versions into the channels where people already watch and listen, while the repurposing work is already built into the plan.
YouTube should be treated like the main video home. Set up the channel as a podcast, publish through YouTube Studio, and keep the thumbnail style consistent so the feed reads like one show. Titles should be searchable, not clever. Bingeable playlists help too, because they keep viewers moving from one episode to the next.
Build the clip system before the first upload
The repurposing pipeline should start from the transcript, not from panic after publishing. One episode can yield 8 to 12 short clips, 1 to 2 longer teasers, a blog post, quote graphics, and LinkedIn posts as outlined by The Podcast Host and Resonaterecordings. That is the gap between a single upload and a content engine.
The clip selection matters more than the number alone. The best clips are self-contained. They usually capture a complete answer, a sharp claim, or a story beat that makes sense without context. Each clip needs a hook in the first two seconds and burned-in captions.
Spotify for Podcasters can handle the audio side of the distribution plan. The goal is to get the episode into the places where the audience already listens and watches. That is why the launch calendar should cover both platforms from the start.
A practical launch sequence looks like this:
- Day 1: publish the full episode.
- Day 2 to 7: release the strongest clips.
- Week 2: publish the article and quote assets.
- Week 3: circulate longer teasers and social posts.
- Week 4: review what drove saves, comments, and watch time.
For process details, this video podcast repurposing workflow guide is directly relevant. The bigger point is simpler. A 45-minute recording can support a full month of content if the repurposing plan is built in advance.
That is why so many new shows die by episode 10. The host thought the episode was the product. It is not. The product is the episode plus the distribution assets that keep it alive.
The Done-For-You Alternative and Your Next Step
DIY launch work compounds fast. Editing takes 4 to 6 hours per episode, and clipping, captioning, and posting add another chunk of time that busy teams rarely budget for. That is why many shows stall after the first burst of enthusiasm.
The alternative is to separate recording from repurposing. RepurposeYourContent handles that layer for podcast, webinar, keynote, interview, or meeting recordings. Send one recording, and the team delivers 20 to 30 ready-to-publish assets in 72 hours, including video clips, LinkedIn posts, quote graphics, carousels, audiograms, and a blog post, all in the client's brand voice with unlimited revisions. Client time is about 15 minutes per recording.
Pricing is customized to volume and quoted on a call. Plans run from $999 per month for one recording to $2,499 per month for a full weekly content engine, and the service includes a 72-hour turnaround guarantee or the client does not pay. That is a real option when the bottleneck is production time, not ideas.
If the goal is to launch a video podcast without burning the team out, book a call or request a sample with RepurposeYourContent and compare the workflow against your current plan.
Tags: